Circle Sanding Jig
This is a handy jig to smooth the edges of rough cut circles if they have an axle hole in the center.
Assemble
the pieces as shown, glue the top strip as well as fastening it with
screws, put a screw in the end of the sliding piece for a stop, without
this sawdust may get between the two parts and affect the setting.
To
set the jig, clamp it to the sander table, measuring from the face of
the disk to the center of the dowel pin for radius of the circle. Slide
the circle in and rotate it against sanding disk.
Put an Old Table Saw to Use
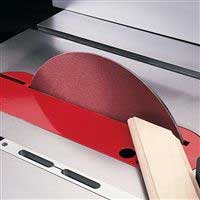
A
table saw can also be converted to a disk sander, this will give you
the added advantage of being able to tilt the disk and make use of the
miter gauge and slots in the table. Many people make use of their old
table saws as dedicated disk sanders. If you are converting a saw to a
dedicated sander it will work better if you reduce the arbor speed. If
the motor runs at 3450 RPM it is best to swap it for one that runs at
1725 RPM, a smaller motor will work for sanding as long as it is 1/3 HP
or larger. If the original motor runs at 1725 RPM swap the llarge pulley
on it for one the same size as the one on the arbor.
|