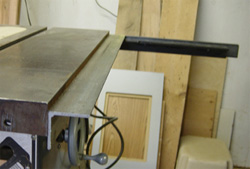
| After pricing aftermarket rip fences and having more time than money I decided that I would attempt to build one.
Space
is at a premium so I didn't want to make the table too large, yet I
still wanted it to be fairly versatile. After removing the stock wings
on my Craftsman contractors saw I decided to just add an extension on
the right hand side and incorporate a router insert that I had already
built.
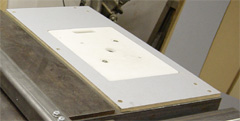
The
table ended up being just under 36" wide, long enough to rip a 16" wide
panel using the fence, however the mounting holes in the rectangular
tube are spaced so it can be moved over on the angle iron support for
wider cuts. In the future if I wish I can remove the rectangular tube
from the rail and replace it with a longer one thereby gaining more
capacity.
Buying all new steel, heavier than some manufactured brands, plus hardware I spent about $100.00.
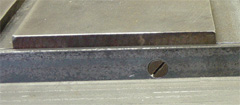
The Rails and Table Extension
 |
|
I
bolted a 1 3/4" X 1 3/4" length of angle to the side of the table,
situated 3/8" below the top of the table. This is the support for the
third miter gauge slot.
Then
I bolted a 1 3/4" X 1 3/4" length across the back of the table,
situated just below the miter slots. To this bolted a short length of
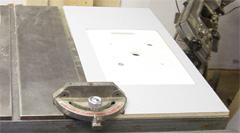
3/4' X 3/4" angle iron to the inside of it to support the router table. I
determined the position by clamping a length of angle iron across the
top of the table and placing the pre-made router table panel between it
and the support, clamping it in position and drilling 1/4" holes for
bolts.
|
|
|
I
drilled 5/16" holes to mount the rail to the front of the table and
1/4" holes to fasten a length of 3/4" X 3/4" angle to support the router
table, positioning as I did the back. Both the 5/16" and the 1/4" holes
have to be countersunk and flat head bolts are used for mounting. |
|
|
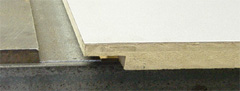
I cut a rabbet in the side of the router table just over an inch wide and left 3/8" on the top.
With
the miter gauge in the slot and the edge of the router table against
the bar I placed a long clamp across the width of the table. I drilled a
1/4" hole in the front of the table through the angle iron.
I
put a temporary bolt in the hole and moved the miter gauge to the back,
clamped the back of the table and drilled a hole at the back and in the
center. I then drilled holes toward the outside through the 3/4" angle
iron.
The
outside edge of the table was fairly narrow so I also drilled holes to
bolt a length of 3/4" angle along that edge to support it.
I then removed the temporary bolt and countersunk all the holes for flat head bolts.
|
The T-Square
|
|
|
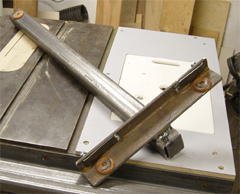
I
cut the 2' X2" tubing to length, drilled and tapped a hole for an 8-32
screw to fasten the glider 2" from the rear end. I then drilled and
tapped three 1/4" holes through the side of the tube, one at each end
and one in the center, making sure it was not in line with the blade,
this will be used to fasten a sacrificial wood fence.
I then welded the three parts of the t-square together and installed the nylon glides.
|
The Lock
|
|
|
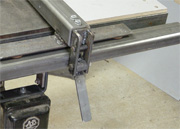
The
cam is made from a 1" diameter piece of round stock with a 1/4" thick
flat bar wrapped around it to increase the diameter and also serve as a
handle.
|
|