Laying Out An Ellipse
|
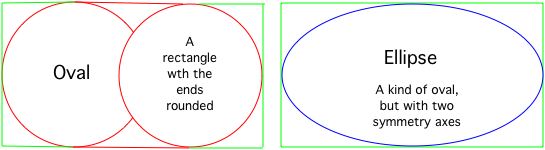
There is often confusion between
an oval and an ellipse, technically an ellipse is an
oval, but for designing woodworking projects they
are thought of as two distinct shapes. The
defination of an ellipse seems to take pages of
complicated formulas.
This is one way to lay out an ellipse using a strip of wood.
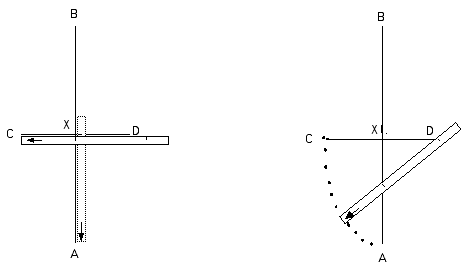
On a sheet of paper mark off the length of the oval A B and at the mid point of this line ( X ) draw the width C D perpendicular to it. Take a thin stick of wood a bit longer than A X, lay it along the A B line, put a mark on the stick where C D crosses the line, mark the bottom of the stick and move the stick up laying along C D with the end mark toward C, put a mark on the stick where A B crosses the line. Line up the bottom mark with the A B line and the top mark with the C D line, rotate the stick putting a mark approximately every inch between points A and C. Connect the dots creating a quarter of the pattern, cut along this line, the fold on C D and draw arc C B, cut along drawn line. Unfold and refold at A B and draw arcs A D and D B, cut along this line to complete pattern. For a permanent reusable pattern draw one quarter on hardboard, cut it out and move it around to draw the other three quarters. Another way is to use two nails and a length of string.
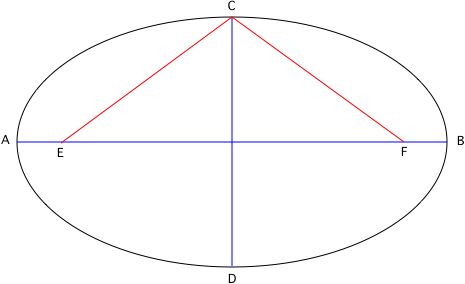
Draw a line AB that equals the length and a line CD that equals the width of the required ellipse so that the mid points intersect and they are perpendicular to each other. These are the blue lines. Drive a finishing nail at point A and point B, using a type of string that will not stretch, tie a loop in the end and loop it around the nail at A, pull it across and tie another loop in it so it is tight when looped around nail at B. Remove the nails and drive one in at C, loop both ends around this nail, pull the double ply of string back toward the line AB with a nail in the loop and drive a nail in the spot where it intersects line AB at E. Do the same to establish point F and drive another nail there, this is represented by the red lines. Remove the nail at C and loop the ends of the string around the nails at E and F, place the point of a pencil in the loop formed by the string and starting at A draw an arc around the top ending at B, move the loop in the string to the other side of F and draw an arc from B around the bottom to end at A.
|