Tips and Tricks of the Trade
These are things that I have discovered along the way.
|
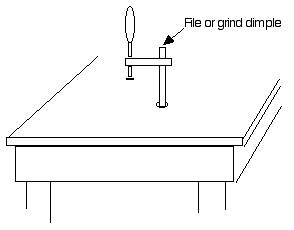
To make bench top clamps drill a hole large enough for the bar of a clamp to pass through, file or grind the dimple off the top of the clamp bar so the jaw can be removed, drill a small hole in the end of the bar. Pass the clamp up through the hole and slide the jaw on, insert a cotter pin or split ring through the hole in the end of the bar.
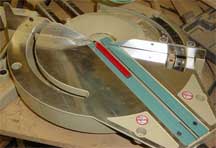
To extend the length of a fixed miter saw cut lay a 1 1/2" thick board on the base under the material to be cut, this will extend the cut on a Delta compound saw by 1". With a sliding model 20" wide boards can be cut. Make the cut as far as possible (aprox.12"), then turn the board over so kerf is facing you, position the material by putting the blade in the kerf, clamp material to base, make the second cut.
To keep plugs connected knot the two cords as shown.
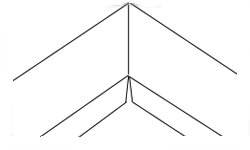
When applying exterior window and door trim if the miter cut is shorter on the bottom it is easier to get a tight fit on the top of the joint. This is usually done by tilting the saw blade a degree or two, however what usually happens is the next time you use the saw to make a straight cut you don't notice that the saw blade was tipped. Instead of tipping the saw blade for miter cuts just lay your pencil on the base parallel to the slot, then lay the trim board on top of it.
When building book cases or cabinets it is necessary to know how high they can be made so that they can be tilted up without hitting the ceiling. The formula for this is: Square root of height of ceiling squared minus width of cabinet squared. Example: Ceiling height = 96" Cabinet width = 24" 96 X 96 = 9216 24 X 24 = 576 9216 - 576 = 8640 Square root of 8640 = 92.951 or 92 15/16"
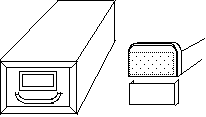
These boxes can be picked up at garage sales and swap meets, they stack well and are excellent for tool storage. The end can be blocked off with a peice of tin fastened in with pop rivets.
To clean up spilled nails or screws put a magnet inside a poly bag, drag through spill area, turn bag inside-out over magnet to put nails in bag.
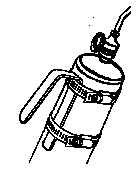
Bend a 12" long peice of 1/8" X 3/4" flat iron and attach it with hose clamps to tank.
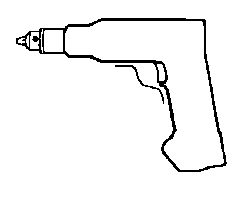
This trigger guard prevents a cord-less drill from starting when put in a tool pouch. Bend a piece of metal strapping as shown, fasten it with tape wrapped around drill.
To measure the length for a shelf when there are styles on the front of a cabinet use two strips each just longer than half the required length. Butt the ends of each to the inside of the carcass, with them laying side by side draw a line across the two of them. Remove the strips, lay them on the shelf board placing the end of one flush with one end of the shelf board, line up the marks on the strips, the required length will be at the end of the second strip.
To clamp an odd shape cut a section of plywood or particle board to fit the object, drill large holes for ends of bar clamps, for corner cabinets make two, one for top and one for bottom to fasten the face frame.
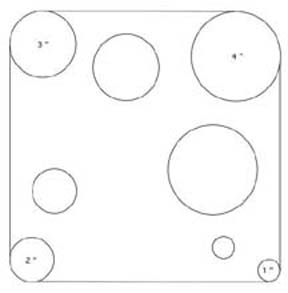
Round each corner of a square of hardboard or plywood with different circle diameters, then cut the same size circles out inside the board, use to round both outside and inside corners of layouts.
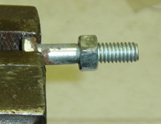
Before sawing off the end of a bolt to shorten it, add a nut, make the cut, file the edge, then remove the nut.
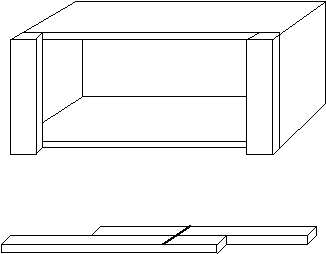
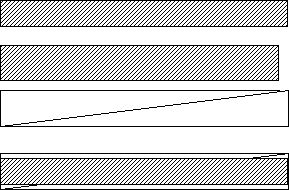
It is late at night, the stores are closed and you need a 24" long 3" wide length of wood, all you have is a 23" long 4" wide board, if it will be an unseen part of the frame no sweat just stretch the board. Simply rip it diagonally and glue it back together sliding the botom section over an inch, then rip it to the desired width. Depending on the grain it may actually be almost invisable in some cases. It's difficult to reproduce the weathered and
aged silver/gray look of wood that has been "finished" by Mother Nature.
This technique uses a mixture of vinegar, water, and rusted steel
wool. |
|